
| Prerequisite | Requirement |
|---|---|
| Safina Plan | Professional or higher |
| Booking Tool | A booking tool of your choice that can generate a link for scheduling appointments. |
The endless back-and-forth via email to find a suitable time costs time and energy. Imagine if a caller could book an appointment on their own right after speaking with your assistant. That’s exactly what Safina’s appointment booking feature makes possible.
You give Safina your online calendar link once (e.g., from Calendly, Microsoft Bookings, etc.) and it takes care of the rest.
New Feature: Did you know? In addition to sending a link, Safina can also book appointments directly into your calendar — fully automatically. Learn more about this powerful alternative in our guide to direct calendar integration.
How Does Appointment Booking Work with Safina?
The process is simple and designed for maximum efficiency for both you and your callers:
- A caller expresses the desire for an appointment during their conversation with Safina.
- Safina intelligently recognizes this request from the conversation flow.
- Your assistant proactively asks: “Would you like me to send you a link to my online booking page via SMS?”
- If the caller agrees, Safina automatically sends an SMS with your link to the caller’s phone number.
- The caller can then take their time to select and book an available slot in your calendar through the link.
A Look Under the Hood: Wondering how Safina detects appointment requests so reliably? We explain it in detail in our article: How Does Safina Recognize an Appointment Request During a Call?
How to Set Up Your Booking Link
Setting up this powerful feature takes less than a minute.
Step 1: Copy Your Booking Link
First, go to your preferred calendar tool (e.g., Calendly, Google Calendar, Microsoft Bookings). Copy your public booking link to the clipboard. This is the same link you’d normally send to clients.
Step 2: Navigate to the Configuration Tab
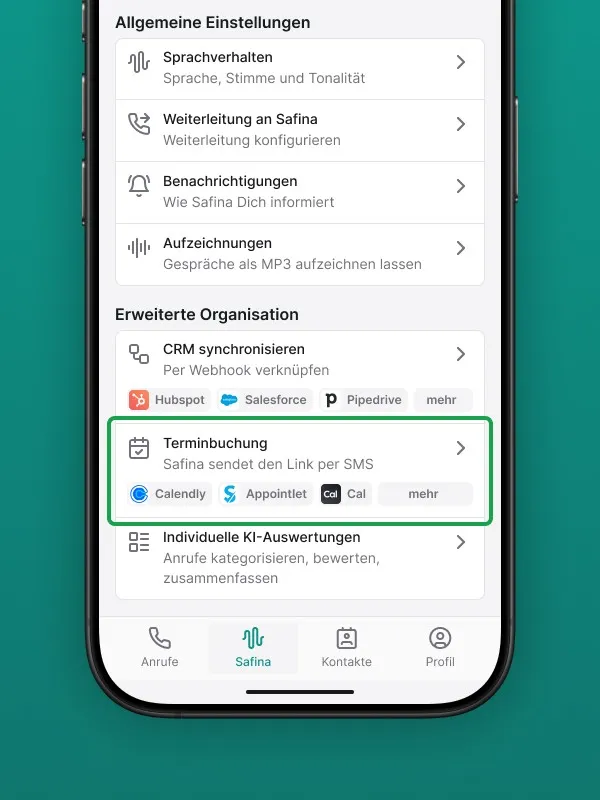
Open your Safina app and go to the central settings area, the “Safina AI” tab. Scroll through the list of settings until you reach the “Appointment Booking” section.
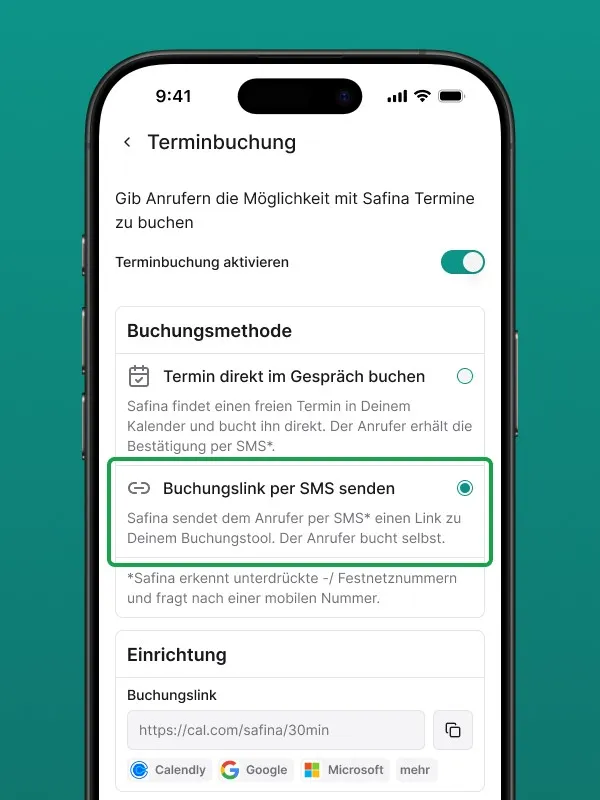
Step 3: Paste the Link and Activate
- Paste your copied link into the designated text field.
- Make sure the toggle at the top is set to “Active” to enable the feature.
That’s it. The setting takes effect immediately.
Your Calendar Fills Itself
This feature is one of the simplest yet most impactful ways to reduce administrative work. You remove the barrier for callers to reach out again, turning a simple phone call directly into a concrete, booked appointment.
Your Safina Team